Showing posts with label Stashbust. Show all posts

Wednesday, November 16, 2011

New Reversible Necklace

After refurbing those vintage necklaces I have lots of chain remnants. I'm also too cheap to throw them away, so I threw them together instead. The long beads are reversible and I couldn't decide which side I liked better so I'll let you chose.


I think I like the smoother side better. This is what it looks like in real life via my cell phone.


Wednesday, October 19, 2011

DIY - Tshirt to Scarf

I made this tank from Tshirt knit a few weeks ago but the darts pulled in a funny way at the neckline so I never wore it. During a recent purging I came across it again and remembered why I had purchased the fabric in the first place. It is very light, soft and vibrant and I couldn't throw it out.  I immediately set to Pinterest for some good stashbusting ideas! A scarf seemed the easiest and quickest route to a Refashion and PS I Made This had the perfect tutorial.


I wanted to spice up the fringe a little bit so I decided to dip-dye the edge of the scarf in bleach. Here's some photos of the process in my kitchen...


I soaked the bleach for probably 3 minutes to make sure it got around every fold then hung it from a cabinet for an hour or so.  The bleach soaked its way up and made the stripe a little wider than I planned but I love it. I rinsed the bleach off and laid it hanging over a table to dry overnight.  The bleached edge turned a nice silver color and looked great when the fringe was cut and stretched. Here are photos of it on my mannequin (also with my work in progress sweater). The 2nd photo actually creeps me out for some reason.


I have a few more Tshirts I'm prepares to slice up for this project. Have I mentioned that I have a severe addiction to scarves? You might be seeing a lot of them this Fall :)

Friday, September 9, 2011

Sept DIY - Bow Cuff Bracelet

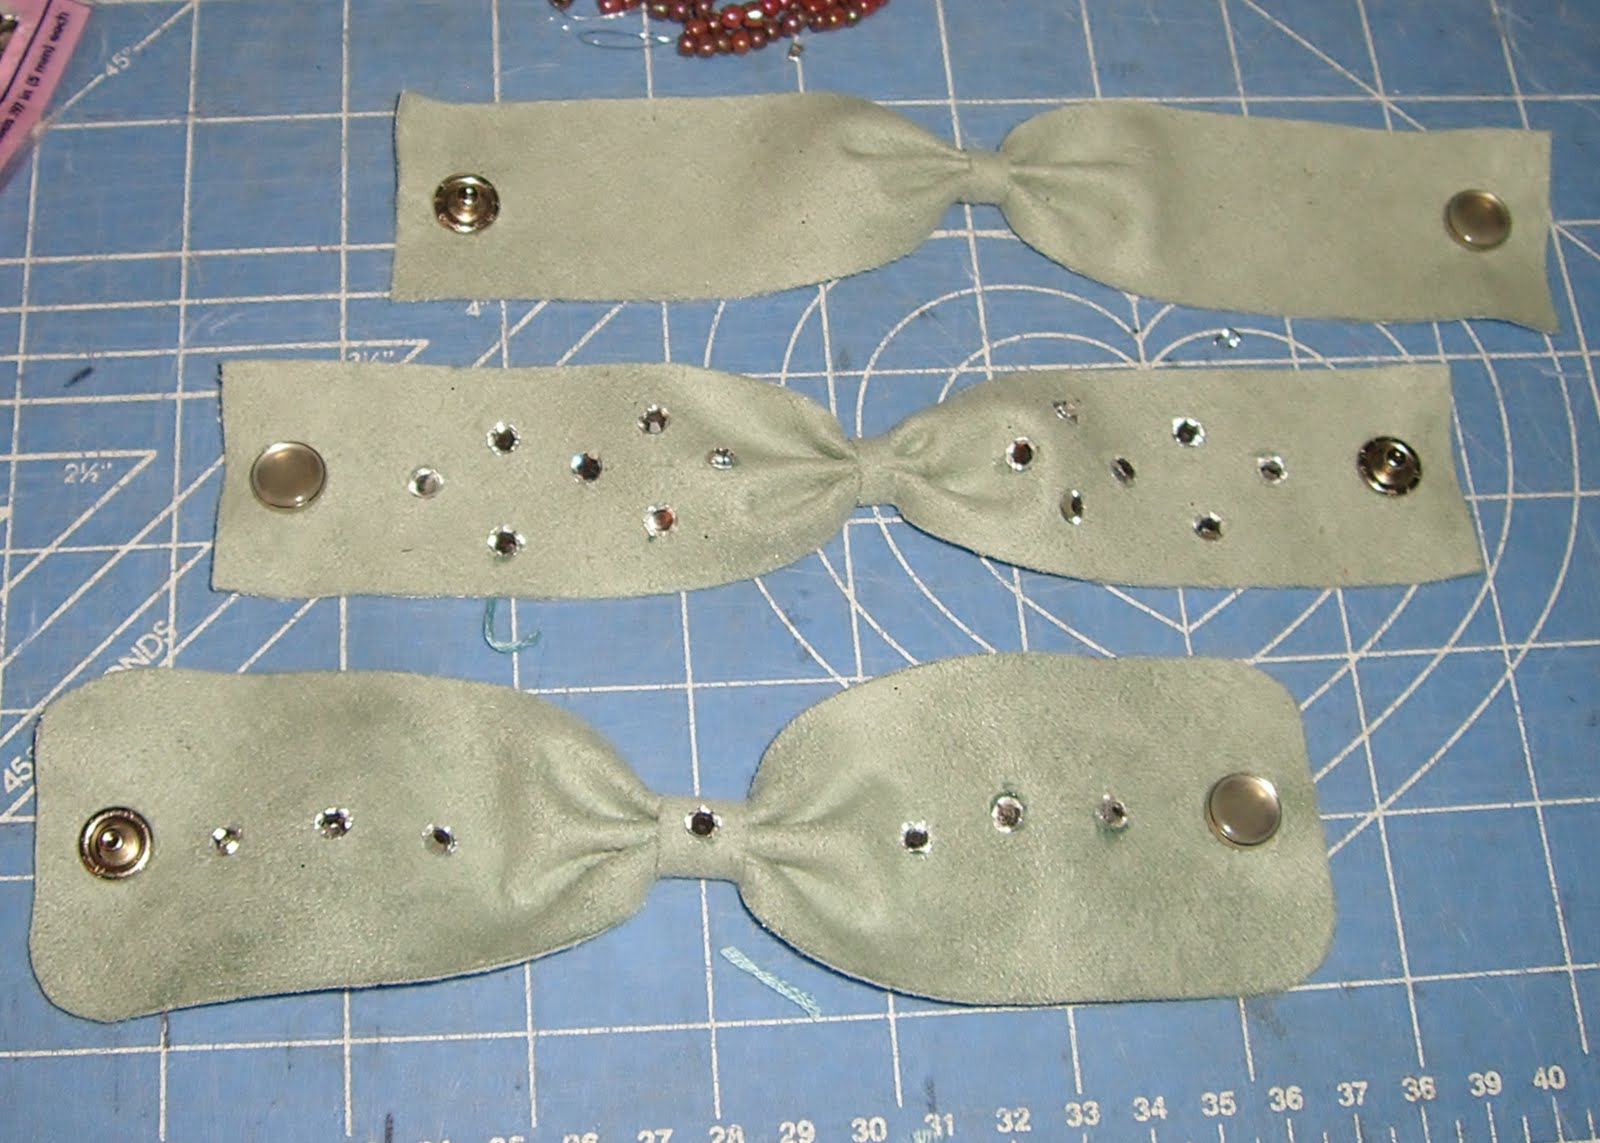
Project #1 from my September Top Pin list is this super cute Bow Cuff Bracelet.This was a great first project because it came together in minutes and once I was able to find the correct fit of the first one, I cranked out 3 more! You can see the tutorial on Oh The Lovely Things and start making your own in every color! The tutorial has great photos and is very easy to follow.


The tutorial uses leather for her bracelet but I was fresh out! For my practice one I used some felt to get the idea of how round I wanted the corners and how long and wide I really needed it to be. I started out making the bracelet 4" wide, trimmed it down to 3", but in the end I preferred it 2" wide for a more delicate bow. I used a light blue/grey suede since the edges don't fray but I also think it would be really nice in any fabric, you'd just have to sew a front and back inside out and turn it to hide raw edges. Might try that next!


I also couldn't help myself and decided to embellish 2 of my suede ones with some glue on stones.
Here's an artsy shot of my favorite one:

 I am definitely adding this project to my list of Handmade Christmas Gifts!

Thursday, September 1, 2011

DIY - September Top DIY Pins

I'm sure you're all already aware that September is the best, most fun, and awesomest month of the year, but in case you dont remember why: 4 day weekend, boyfriends birthday, my birthday, birthday vacation, our 6 year anniversary, and therefore lots of parties and presents! I know - Whoa that's a lot of super amazing stuff packed into one month. To celebrate I picked a few quick DIY's for the month (mainly because all my weekends are GONE).  These projects have few steps and provide me with the instant gratification that I crave. Happy September!

1. Leather Bow Cuff by Oh The Lovely Things

2. Cute little zipper pouch to match my envelope bag by Noodlehead

3. Feather Earrings as sold at Francesca's Collections

4. Ruffled Belt by Days Like this


Friday, August 26, 2011

DIY - Tank Top Copy

Just a real quick post because I'm not feeling so good tonight...

I know Summer is coming to an end soon, but a blousey tank top is a season-less staple in my wardrobe. In the warmer months I like to throw a light scarf or vest on and in the chilly months (it's Florida, let's be honest) I'll warm up with a cardigan or jacket. Basically I get hot pretty easily and the tanks make my life easier!

So instead of going out and buying 20 more tanks, I used one from Old Navy that fits me perfectly and has the simplest silhouette.  Here's a great tutorial on copying your favorite shirts on CraftyStylish.


 Here are my first two tanks...I'm planning on 2 more. I'm basically using up my knit stock.


Tuesday, August 23, 2011

DIY - Envelope Bag

It was my intention to make this bag into a laptop sleeve or more of a file/paper organizer than a purse, but when I got down to it I just really wanted to turn it into another cross-body bag to use for the rest of the summer.  Needless to say, this project made it onto my list of Top DIY Pins for August. 
 This post by Veronika of Tick Tock Vintage served as my inspiration. I love  the lines that make it "envelope-y" and the giant leather tassels keeping it closed.

I used this tutorial from SwellMayde for an oversized envelope clutch and adapted it as necessary.  This tutorial is for leather, vinyl and other materials that don't fray, but my envelope is going to be made of a home-dec fabric. Click on the illustration to enlarge for her measurements and instructions.

My pattern piece for the bag is 24" long from bottom to point and 14" wide.  The thin strips to the right are going to be my make-shift bias tape to bind the raw edges of the bag. They are 2" wide.  Not pictured is a 50" long x 2" wide strap.


I started by folding the bag how it will be sewn and pressed it so I would have some guidelines.  To make the "envelope" style lines on the front of the bag's body I took the front two corners and folded them down, creating the style lines. I stitched these down as close to the fold as possible and pressed the front open again.


I don't want to leave the opening of the bag with a raw edge and I thought a bound edge would look nicer than just a rolled hem. Start by pinning the strip to the edge, right sides together. Sew with a 1/4" seam allowance.


Press the strip up with the seam allowance towards the strip. Now press the free edge of the strip in towards the seam. The edges shouldn't meet in the middle as this will cause bulk. Fold the strip so the raw edge is now enclosed under the nicely folded edge. Stitch in the ditch, hiding your stitching line in the already-there seam seen from the front.


I love the band it creates while hiding all the raw edges.

Repeat for the point of envelope flap, doing only one diagonal at a time.


Fold over 1/2" at one edge of the strip and overlap the finished binding at the point. Sew and press this strip up and repeat the binding steps.


Look how clean the edges of the envelope look!

Fold the bag on the previously pressed guidelines, right sides together. Pin and sew the two side seams at 1/4" seam allowances, backstitching several times at the beginning and end to secure the corners.  Turn the bag right-side-out and press the side seams flat.
To create the cross-body strap, fold the 50" strip in half width-wise, right sides together, and sew all the way down at a 1/4" seam allowance.  Thanks to Pinterest I came across a great tutorial from Pickup Some Creativity to make turning a tube super fast and easy. Before folding in half, sew the end of a long, thin grosgrain ribbon to one end of the strip and sandwich the ribbon between the fold of the strip. Make sure the ribbon won't be in your 1/4" seam allowance and sew all of the way down the strip. Pull the ribbon to turn the tube right side out.  Love this tip and there's much more on their Sewing 101 page!

 I added a magnetic snap to the point of the flap to keep things closed and an eyelet above that to secure my fabulous gold tassel. Follow the package instructions to install both of these (completely optional additions).

Thread the loop of the tassel through the eyelet and either tie it in a knot (if it's long and wide enough) or tie some ribbon through the loop and into several knots.  This will keep the tassel from slipping through the eyelet.


Sew the straps to the side of the envelope bag, making sure to secure with lots of stitching. I did a box of stitches where the strap's raw edge is folded under.

Then I added my tag :)

Then I proceeded to take WAY too many photos because I am severely in love with this bag.
 

 Look how cute that tassel looks!