Sunday, January 30, 2011

Sharing - Weekend Off - Kind of

I didn't get much crafting or sewing done this weekend. We went to my parents' house Friday - Sunday to visit and instead of working on any of the things I put on my list to get done, we went shopping...

At Olde Time Pottery...


At Hobby Lobby...


At the flea market...


...At Joann's


Inspiration - New York & Co
I found some great photos in the New York & Co look book that sort of goes with my new collection. Check them out:

Thursday, January 27, 2011

Portfolio - Fabric


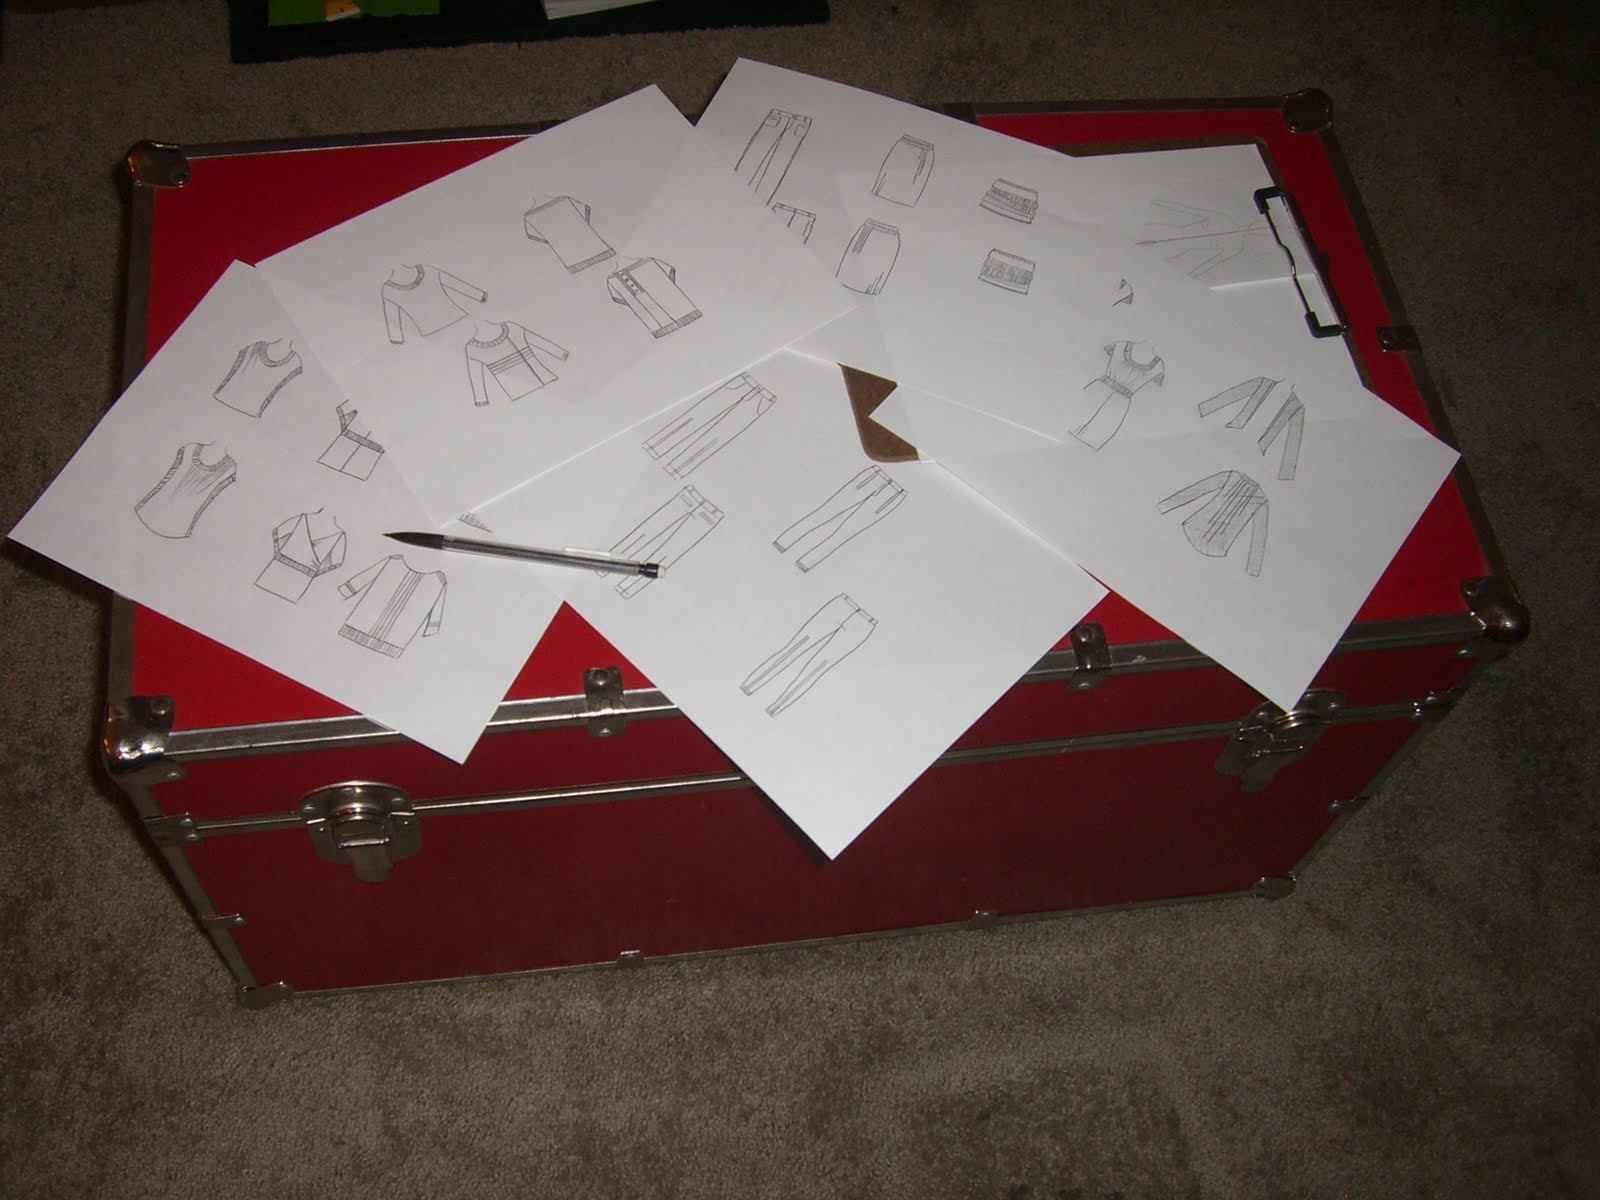
I have diligently been sketching and planning and picking and choosing. It’s hard to believe but I have become quite attached to these designs. Thanks to Flickr I’ve been flaunting all my pages as I finish them.

This week we worked on fabric choices. I wanted to know all knits, whether it was sweater or jersey, anything stretchy really. Focus is on ease, comfort, effortlessness. The styles are pretty boxy and tunic-y for an “I just threw this on” chic on top and a fitted straight bottom to balance it all out. I also want to work on a few accessories. I’m not sure if these will be included in the portfolio but it couldn’t hurt to throw them into the illustrations when we get there.

I grouped the tops and bottoms together so they’d be easier for you (mostly me) to visualize when choosing the colors and fabrics. My colors were picked from the photo above of the strips are stained glass. These lines that frame that frame the glass are my inspiration for the vertical and horizontal pin tucks and pleats in each look. I love the different shades of blues and greens and even grays in the glass.

I mixed and matched and here’s my brainstorm:


So my looks ended up being (left column, right column):
1. Sweater + twill pants
2. Sweater + knit pants
3. Blouse + sweater jacket + twill pants
4. Sweater + vest + knit skirt
5. Blouse + knit pants
Still deciding on which pieces to actually make and photograph. Do I want to make them for myself? Do I want to model them myself? Do I want to hire a model a thousand sizes smaller than me and not get to wear the outfit? I don’t know!

Here are the final fabric choices:

Sweaters are made from a thick sweater fabric, originally blue or green mixed with white yarns to soften the deep tones. The ombre will be hand dyed by piece. There’s a definite stretch to the sweater fabric but the designs are so roomy there’s no need.

Blouses will be make from jersey knit fabric with a sheen. I wanted to mimic silk but give the blouses some warmth against the fall weather. They will have a great drape and flatter any figure. Again the ombre will be hand dyed by piece to suit.

Knit pants are in wool double knit. The wool double knit holds its shape incredibly well while still having enough give to fit any legs. Again the thickness of the fabric protects against the elements. Liken these to very, very thick leggings.

Twill pants will still have a good amount of stretch to hug your lower curves while still giving an esteemed trouser feel. These are straight legged and slimming to counteract the large sweaters and blouses.

All the sweaters and blouses have some ribbing to trim various necklines, armholes, hems and seams. These ribbings are super stretchy and soft to add that extra comfort and warmth to the tops.

Monday, January 24, 2011

DIY - Beaded Circle Necklace Review


Sorry for the late post. Was not very productive in the way of sewing but made a lot of headway on my portfolio project. I also have to work on my restyle design for this week.

So tonight I tried out a Martha Stewart tutorial. I have to confess I am on her website all the time looking for new crafts in every category. Recently I bought a tool kit for wire jewelry. I have no idea how to use it. I foresee a lot of youtube videos in my future.


Look what I did -

Tutorial – Circle Beaded Necklace Tutorial by Martha Stewart

Ease – 4/5

Difficulties – I have no idea how to you my jewelry materials so this was a lot of trial and error for me. When the tutorial says to add a crimp, I have to improvise with what I have, which may or may not be a crimp. This isn't Martha Stewart's fault but maybe a little more direction would have been helpful. I was better off looking at the diagrams and counting the beads than reading the instructions.

Alterations - I tried to adapt what I learned to make my own version of a circle bib necklace. I ended up with a more 3D statement necklace that you can clearly see if my first jewelry project. I stuck with the original design in the wooden beaded version and I absolutely love it.

Make it again? – Yes. I'm going to learn how to do loops and all those pretty things with head pins and what not. When I made the larger wooden version I didn't have any crimps and just kind of tucked the wire behind the beads. It might not be neat but I love the look of giant wood bib. Next time I definitely want to use smaller, but still wooden beads. Check it out!


This one came out much better.

Thursday, January 20, 2011

DIY - Bow Necklace Tutorial


Recommended fabric: I used a light weight cotton/poly blend as well as sheer chiffon. You can probably use just about any fabric, but you may have to alter the measurements to eliminate bulk in the center of the bow. If you are using a heavier fabric start with a rectangle (3” tall) instead of a square (5x5”).

Materials:
Scrap of fabric, necklace or chain, clasp, any beads or trims

Tools: Sewing machine, scissors, jewelry crimpers, hot glue gun

Time: ~20 min depending on trim


1. Cut 2 squares, 5x5”, and 1 strip 1.5x5”


2. Place squares on top of each other, both face up. Machines or hand baste and gather down the center. Gather as much as possible and tie the ends to secure.


3. Sew the strip into a tube, right sides together. Turn right side out and press flat.


4. Glue one end of the strip to the back of the bow. Wrap tightly around the front and glue to back. Trim off excess.


5. To attach to necklace, thread a needle and tie the thread to the necklace chain. Pass the blunt end of the needle under the bow’s strip in the back making sure you are above the glue dot. Pull the thread through and the chain with it. Secure the clasp at the ends of the chain.


6. To add decorative chains below bow, thread the chain to the needle as before. Pass the blunt end of the needle through the bow’s strip making sure you are below the glue dot this time. You can decorate this in any way. I added headpins strung with beads on one and glass beads on jump rings. This hurt my fingers and took forever but I love how they glisten. Have fun with it!

Tuesday, January 18, 2011

Portfolio - Sketches and Inspiration

Here are a few of my sketches close up so you can see them. I'm still not sure how I feel about the separates. I have 5 looks planned out, it's just a matter of designing and arranging them. No bid deal right?

1. heavy knit sweater + twill pants
2. heavy knit sweater + knit pants + bolero
3. heavy knit sweater + skirt + fly away vest
4. light knit blouse + twill pants + heavy knit sweater jacket
5. light knit blouse + knit pants + twill jacket

Check out the sketches :)


I wanted to share some inspiration too. I like to check out online storefronts to see if what I'm seeing in my head is sellable right this second. Which might not be how "real" designers think, seeing as how they plan seasons ahead. But being a free-agent I don't have to subscribe to that at the moment.

These are all from Express.com and most are on sale. I love love love their knits and dress pants.

Sunday, January 16, 2011

Portfolio - Sick but sketching


So I was sick in bed all day today and didn't get to do the tutorial review I planned on. I managed to sketch a few ideas for my portfolio project. I don't have a scanner at home so I am showing them off via photos. Hopefully I can add a few on Monday to round out the ideas.

Basically I'm using style line seams, pin tucks and pleats to imitate the lines in stained glass windows. The fabric will tie it all together I think. I like to think in separates and create looks as I go as opposed to creating a top and bottom together. This is how I shop and therefore this is how I design.

I'd hate to beg you not to judge the sketches yet but how can I when I just posted them on the web...?


I also did a quick 10 minute project for Project Restyle. I took a 100% silk scarf and turned it into a turban-style elastic headband. It's a little small and I think I'll try it again in a more textured fabric that won't slip off my head. Maybe look for a pattern/tutorial soon for that! Added to my to-do list.

Tuesday, January 11, 2011

Project #2 - Portfolio


The other project I’m working on it creating an updated portfolio. A friend and I are doing a small collection per season, complete with mood board (already done!), rough sketches, flats and illustrations. Maybe I’ll even try to make one piece or look from each season, if I already have the fabric handy that is.

So we’re starting with fall and my favorite thing about fall is that I get to wear all my dearly loved sweaters and cardigans (yey!). I am obsessed with texture and print in clothes. I hate wearing all solids, it makes me feel 2D. What I’m thinking for these sweaters is using a thick knit fabric, almost ribbed, and create texture and structure in the garment. Knits are generally soft, draped and flowy. The direction is not necessarily fierce or sharp angles but to create a definite interest with a 3D design.

I also find myself focusing on one part of the body when designing. One year it was boat necks because I was infatuated with collarbones and delicate necks. Another time it was drop waists to accentuate full hips, god help me. This collection I think I want to focus on the back. Not showing it off so much as using it as a canvas. Hopefully I’ll have some sketches up soon to share! You can check out my mood board below.


Inspiration~
I went over to anthropoogie.com to check out what they have going on in the ways of sweaters. I found a few interesting textures in the ways of cut-outs and appliqués. Check it out:

Eyes have it cardigan $128

Of the ages pullover $88

Delicate drafts cardigan $98

Monday, January 10, 2011

DIY - Happy New Year!

There are a lot of projects in the works for the beginning of the New Year. Maybe I’m a little too ambitious this month but I guess we’ll see how far I get. The biggest project I’ve started on is Project Restyle, hosted by A Beautiful Mess and Smile and Wave.

How it works – Take used or unwanted items and turn them into something new! You can restyle, repurpose or transform things you have collected and are just lying around. Check out the Flickr group for a slideshow of inspiration.

So far for Project Restyle I’ve done a sweater a la Grosgrain (check out the tutorial here)


A Tshirt necklace with a flower pendant


And I submitted my Ikea table just to be different!


Look What I Did –

I tried out this Ruffle Necklace from Poppy Chic.

Tutorial – Ruffle Necklace by Poppy Chic
Ease – 4/5
Difficulties – Gathering 30" of fabric without the threads snapping. I also used a pretty cheap chain that broke twice while stringing it through the casing.
Alterations - I macahine basted the casing because I was too tired to hand stitch at the time. This is probably why it was hard to gather the fabric.
Make it again? – I love the fan that the gathers fabric creates. This is very simple but definitely stands out. I would make this again with a chiffon fabric for a lighter fan.